Using Keycloak with Ignition
10 minute read Download PDF
Table of contents
Introduction
Keycloak is an open-source Identity and Access Management solution for adding authentication to applications or services. With Ignition, Keycloak functions as an Identity Provider to authenticate users and define roles to access client/session views.
A major benefit of Keycloak is that this solution provides a strong security option external of Ignition that functions within a local or on-premise-only network architecture. There are no requirements to connect to a cloud provider for any additional authentication (unless desired).
Keycloak also provides easily configurable Two-Factor Authentication (2FA) using either the Google Authenticator or Red Hat’s FreeOTP authenticator apps (iOS, Android). This functionality can be used as a second level of authentication to existing identity management systems, such as Active Directory.
Running Keycloak as a Docker Container
See Appendix for additional resource links about Docker if needed.
1. Run the following command to start Keycloak Docker container.
docker run -p 8080:8080 -e KEYCLOAK_ADMIN=admin -e KEYCLOAK_ADMIN_PASSWORD=admin quay.io/keycloak/keycloak:20.0.1 start-dev
2. Once Keycloak is running, navigate to the admin console.
http://localhost:8080/admin
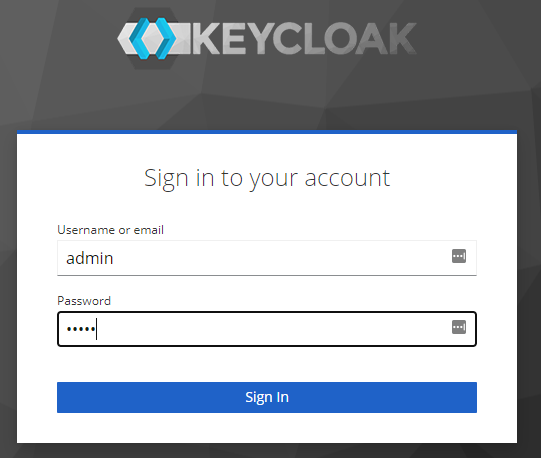
3. Login using credentials defined in Docker run command.
username: admin
password: admin
Configuring and Creating a New Realm
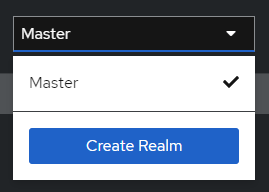
1. Create a new realm by selecting ‘Create Realm’ in the dropdown.
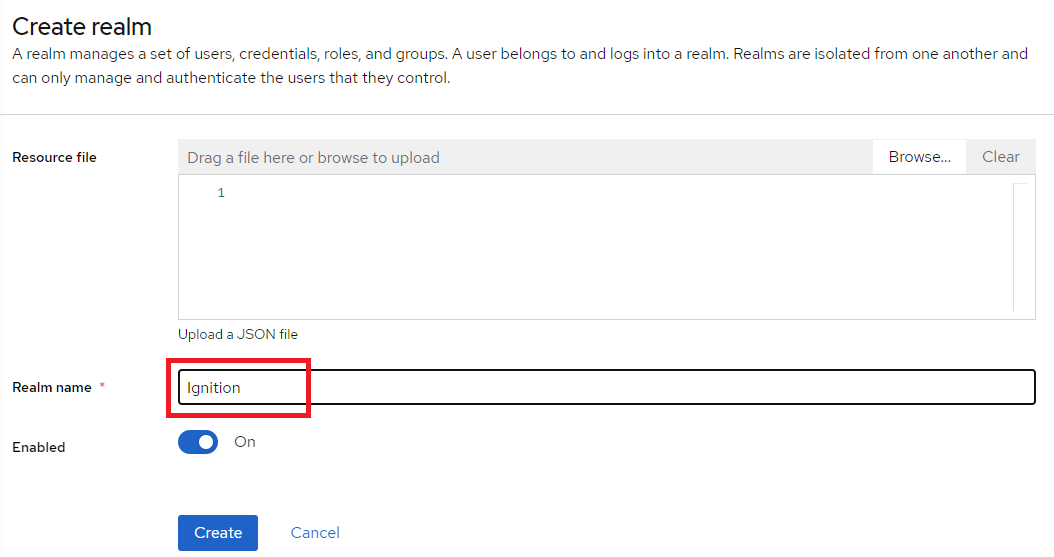
2. Name the realm ‘Ignition’ and click Create.
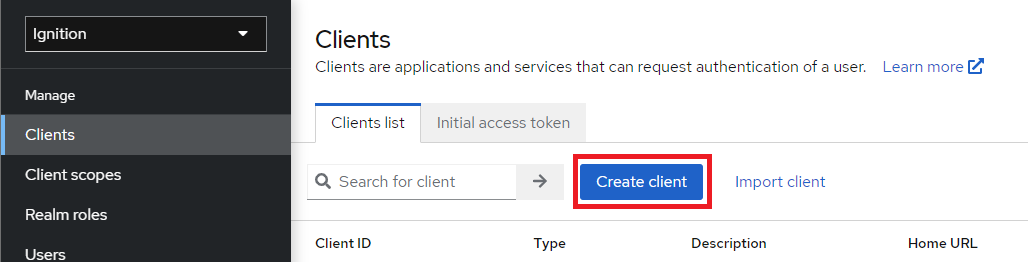
3. Select the newly created Ignition realm from the dropdown. In the Clients tab, click Create client.
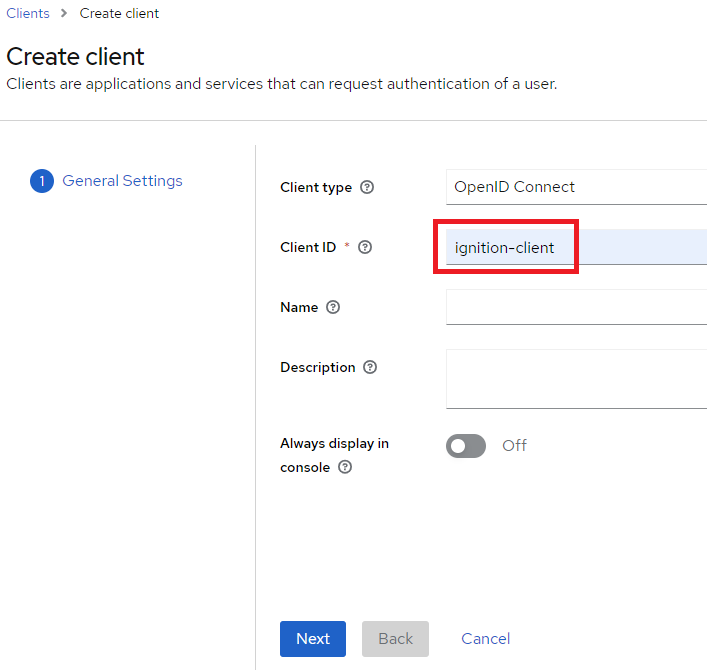
4. Select OpenID Connect as the Client type. Enter ‘ignition-client’ as the Client ID. Click Next.
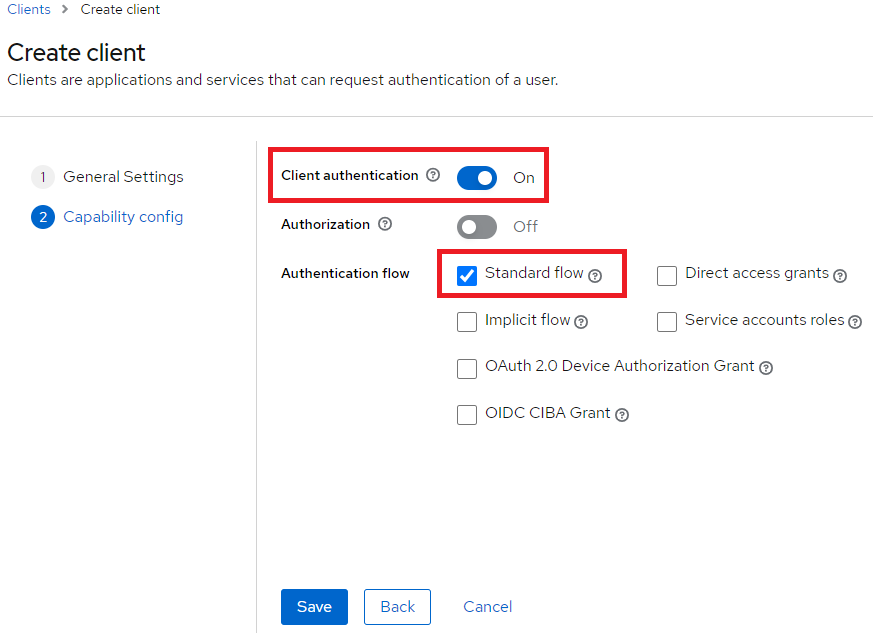
5. Set Client authentication to On and Authentication flow to Standard flow (disable others unless desired) , and click Save.
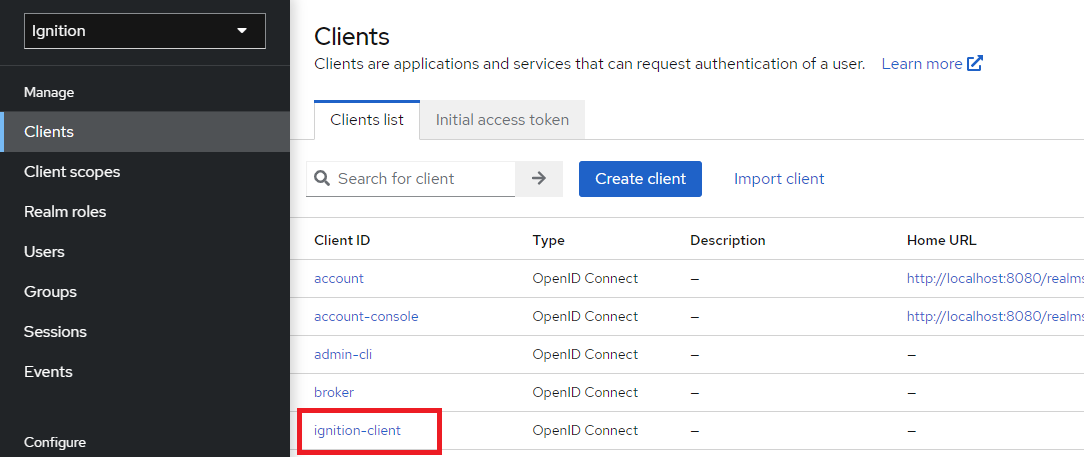
6. From the Clients list tab, select the new ignition-client.
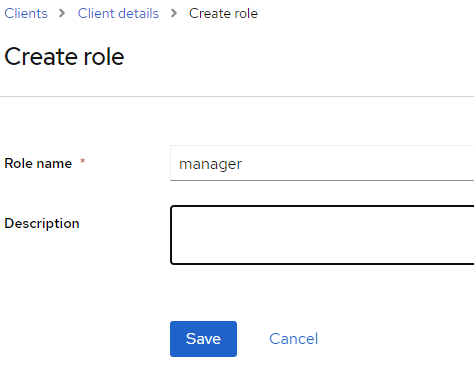
7. Select the Roles tab and click Create role.

8. Create a new role called ‘manager’ and click Save.
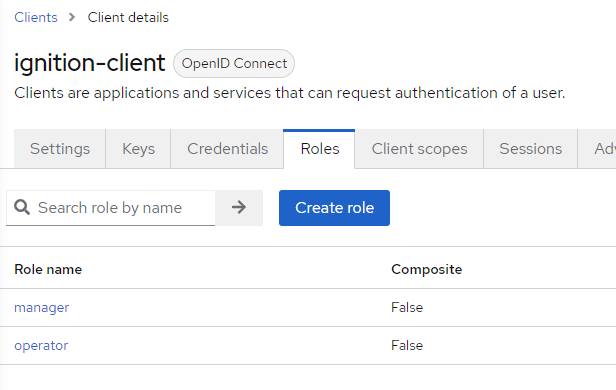
9. Following the same process, create another role called ‘operator’. Two roles should be available for the client name ‘ignition-client’.
10. Once the roles have been created, the client needs to be configured to pass the roles, along with the response, when authenticating a user.
Navigate to Client scopes > roles.
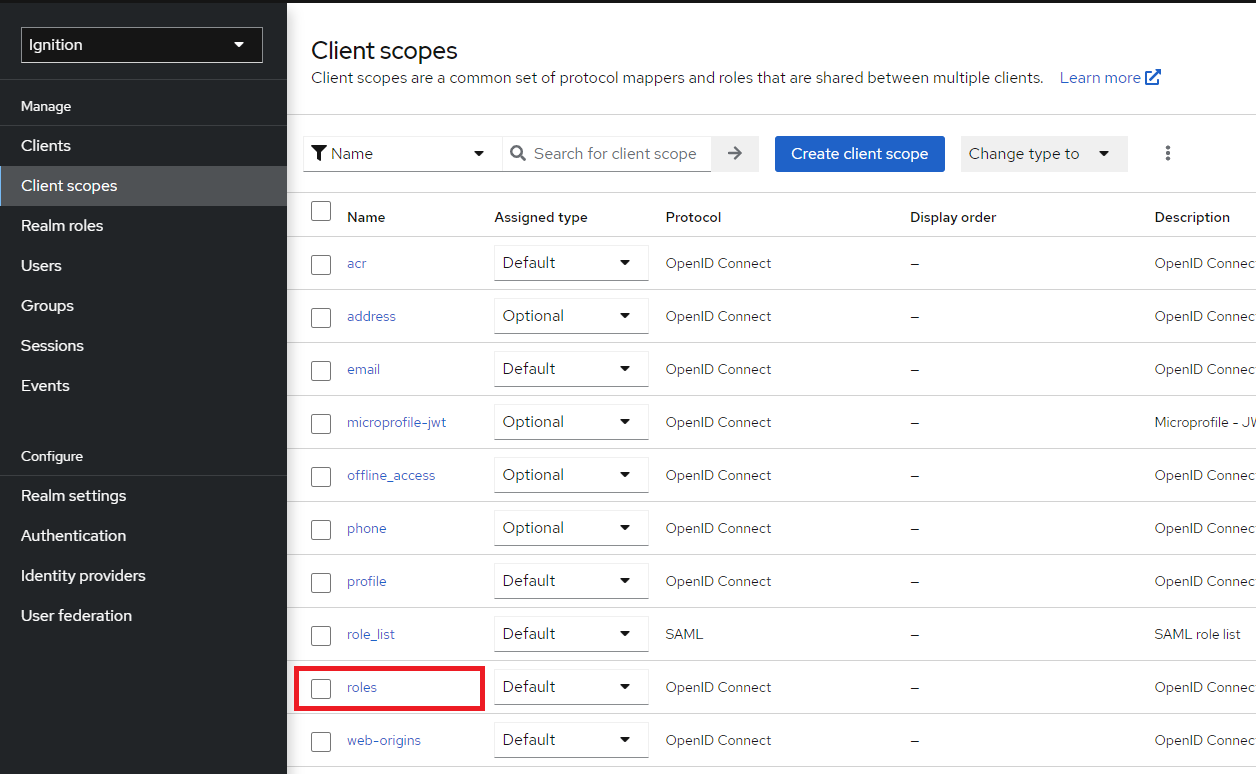
11. Select the Mappers tab, then select client roles.

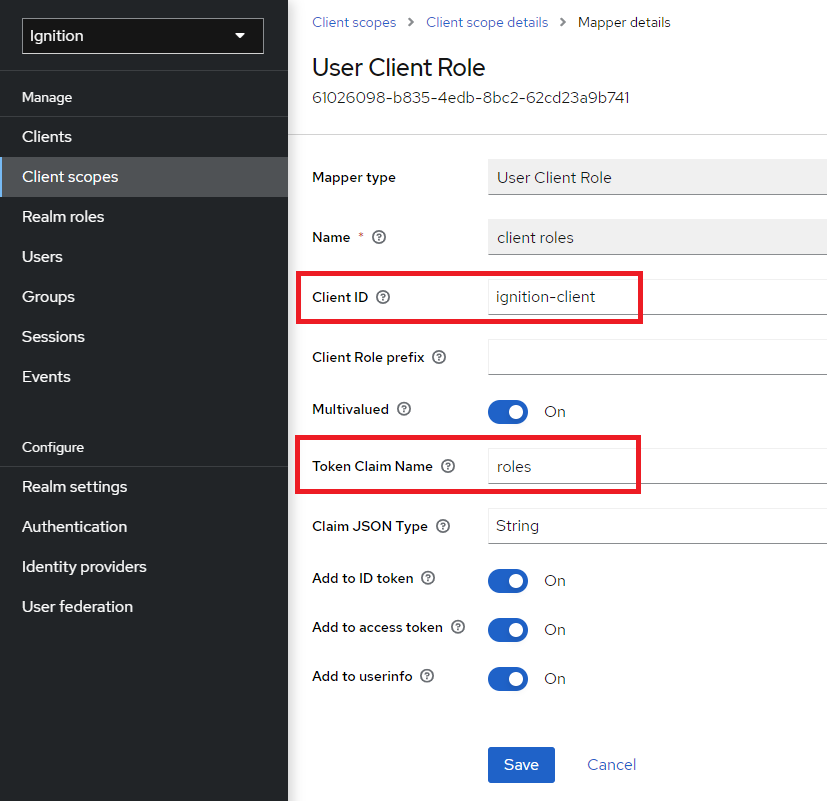
12. For Client ID, select the ignition-client from the dropdown. Next, set the Token Claim Name to ‘roles’ only, which will make parsing the roles simpler in the Ignition User Attribute Mapper.
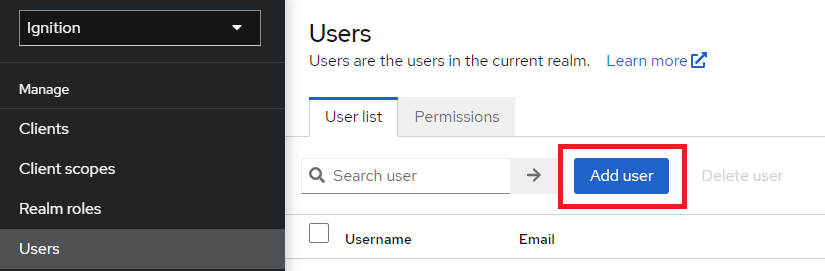
13. Navigate to the Users tab to create some new users for the Ignition realm. Click Add user.
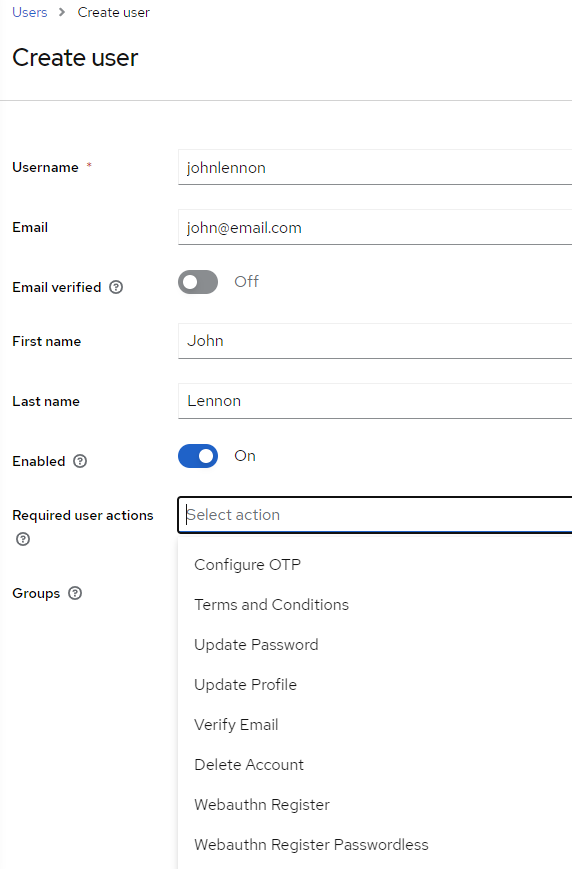
14. Create a new user. Note some of the options for required user actions, such as OTP. These will be discussed later in the document. Leave this blank for now.
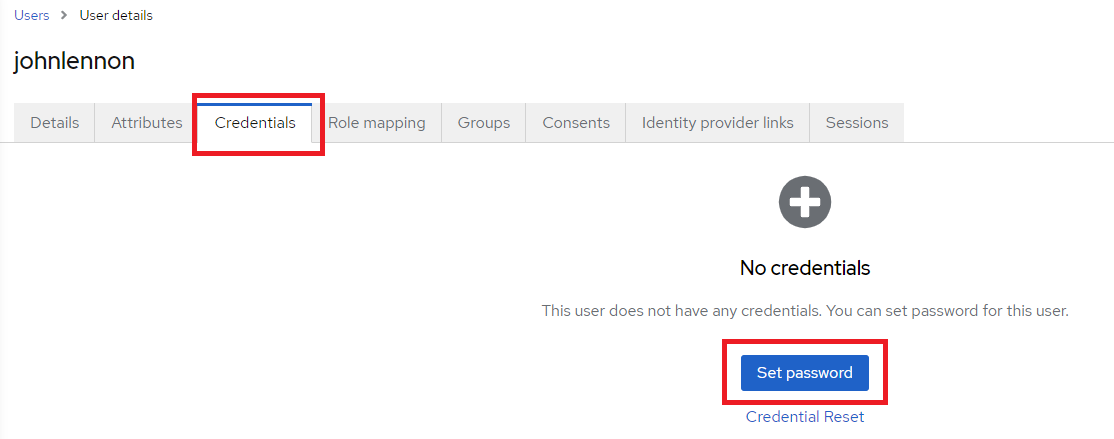
15. Once the user has been created, navigate to the Credentials tab for that user and select Set password.
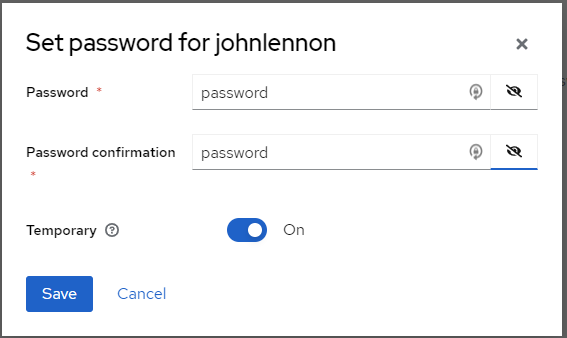
16. Set the initial password for the user. Leave Temporary set to On. This will force the user to create a new password on initial login. Click Save.
17. Navigate to Role mapping and click Assign role.
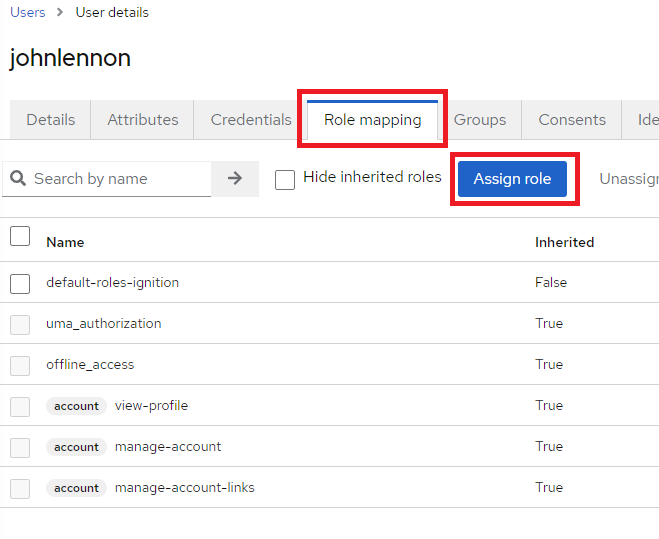
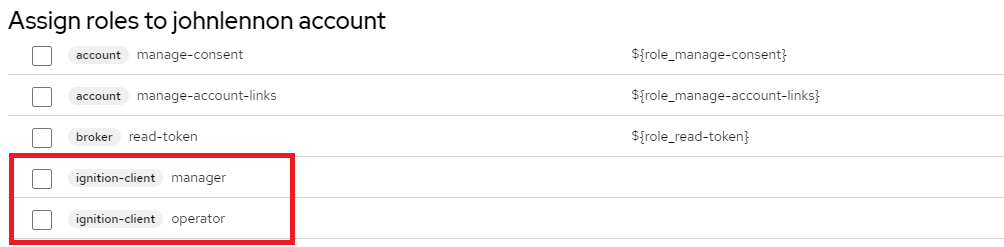
18. Select the dropdown box to display all available roles.
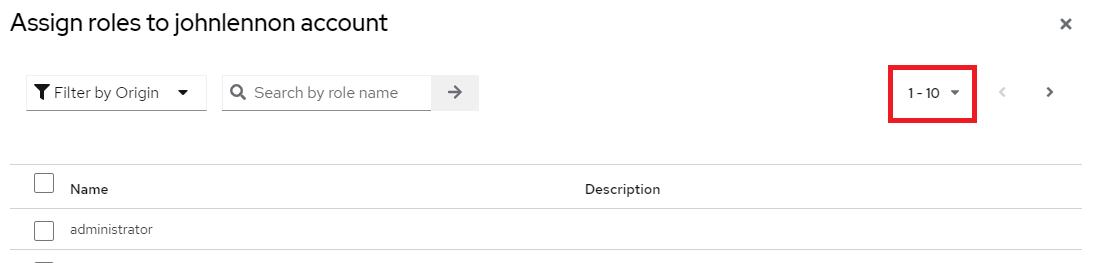
19. Select either one or both of the ignition-client roles for the user, and then click Assign.
20. This completes the initial setup of the Ignition realm. Next, Ignition will be configured to utilize this Keycloak identity provider.
NOTE: Please keep the Keycloak admin console open, as additional items will need to be referenced and added during the rest of the Ignition configuration.
Configuring Keycloak as Ignition Identity Provider
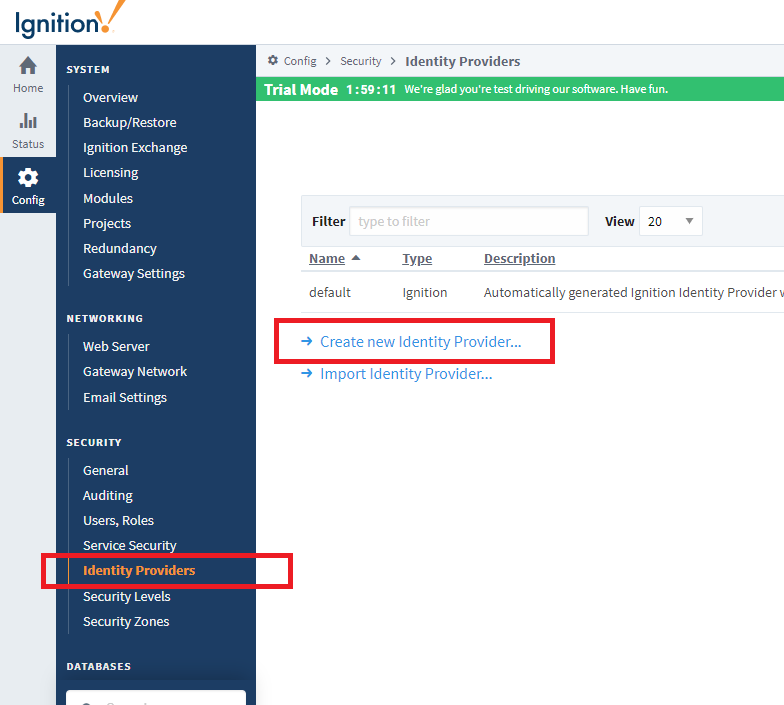
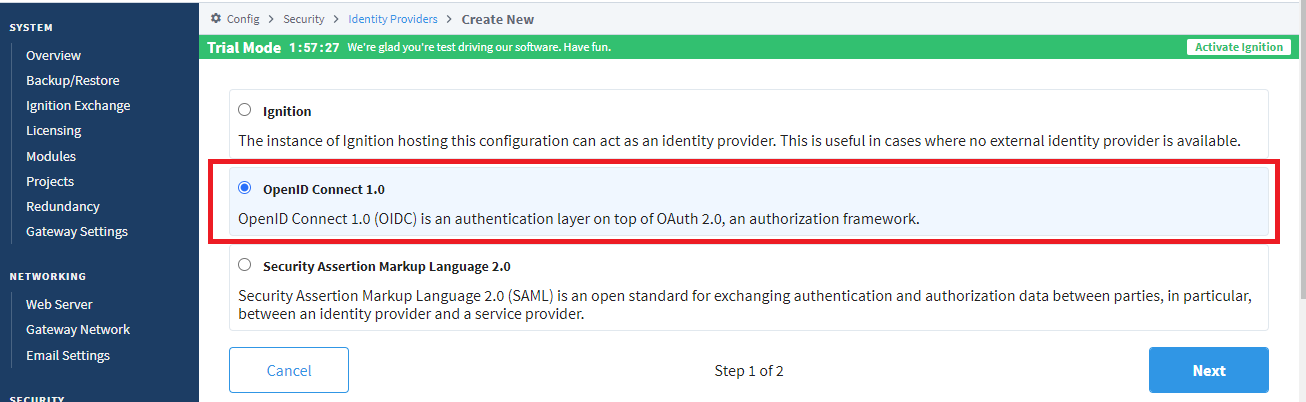
1. Open the Ignition Gateway page, login, and navigate to Config >Security > Identity Providers. Select Create new Identity Provider…
2. Select OpenID Connect 1.0 and click Next.
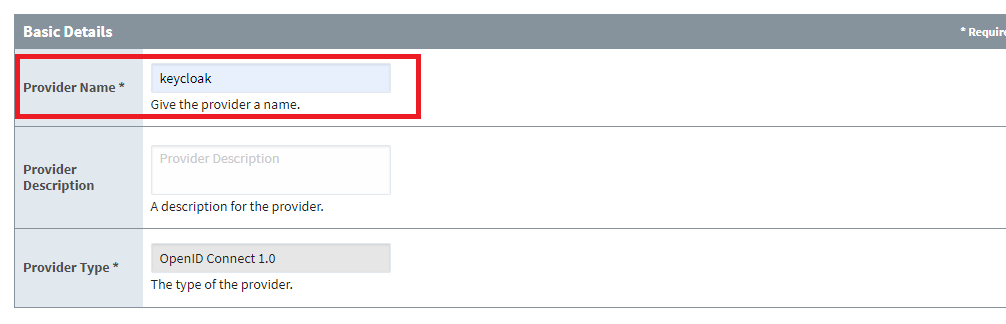
3. Enter in the Provider Name as ‘keycloak’.
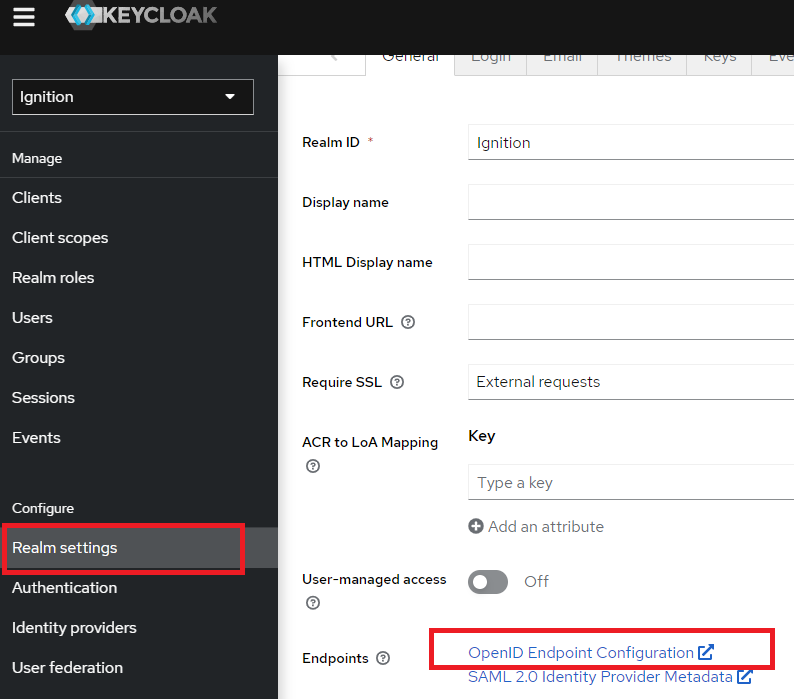
4. For the Provider Metadata, return back to Keycloak and navigate to the Ignition realm Realm Settings. Click on the OpenID Endpoint Configuration link. This will open a browser window. Copy and paste the endpoint URL.
NOTE: It is strongly recommended that Require SSL be enabled in Keycloak for all requests in a production environment.
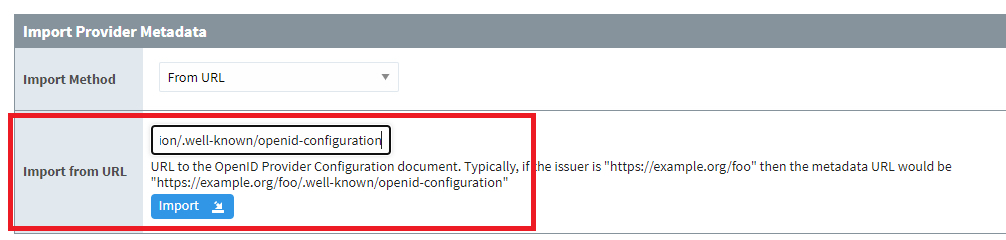
Default endpoint:
http://localhost:8080/realms/Ignition/.well-known/openid-configuration
5. Once the URL has been pasted into Ignition, click Import. Ignition will respond with a successful or failed import of the metadata.
6. There are two additional parameters for the provider configuration that need to be manually entered. These are the Client ID and Client Secret. The Client ID is the client created in Keycloak, which is called ‘ignition-client’ for this example.
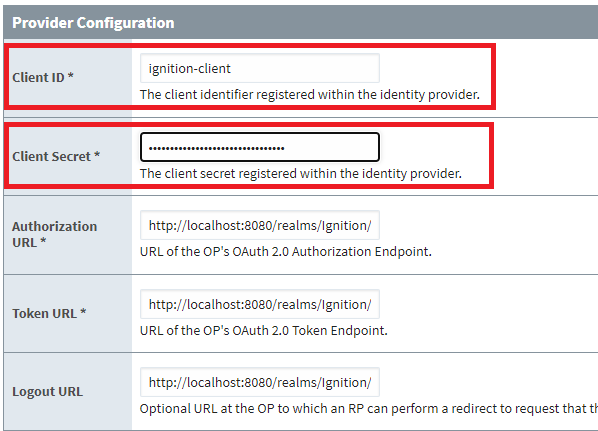
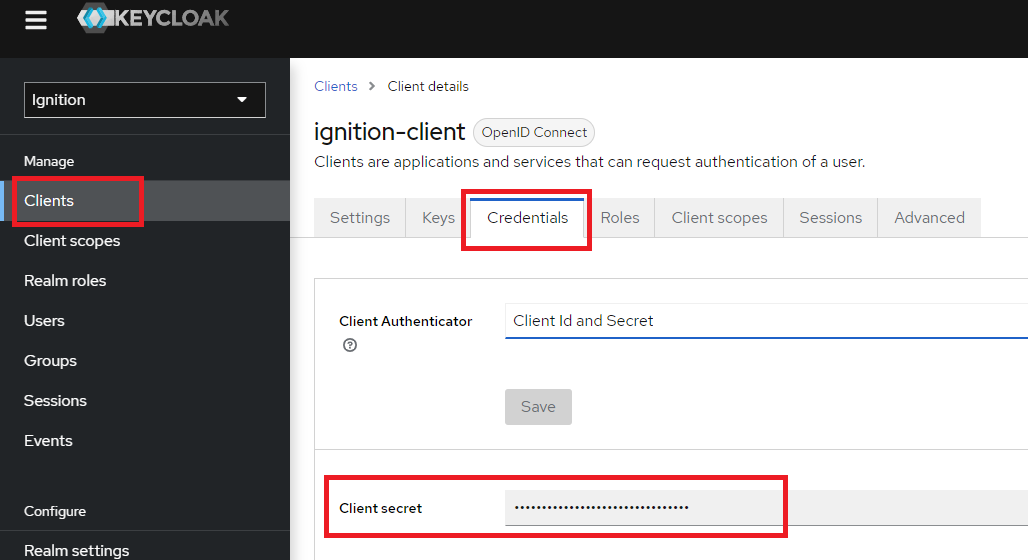
The Client Secret is found in Keycloak by navigating to the Clients > ignition-client > Credentials tab in Keycloak. The Client secret can be copied from here and pasted back into the provider configuration in Ignition.
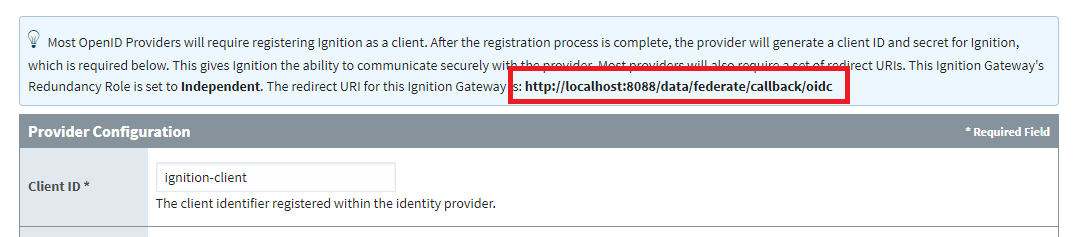
7. Locate the redirect URI located directly above the Provider Configuration section. Copy this value for use in the next step. Click Save to complete the Provider Configuration.
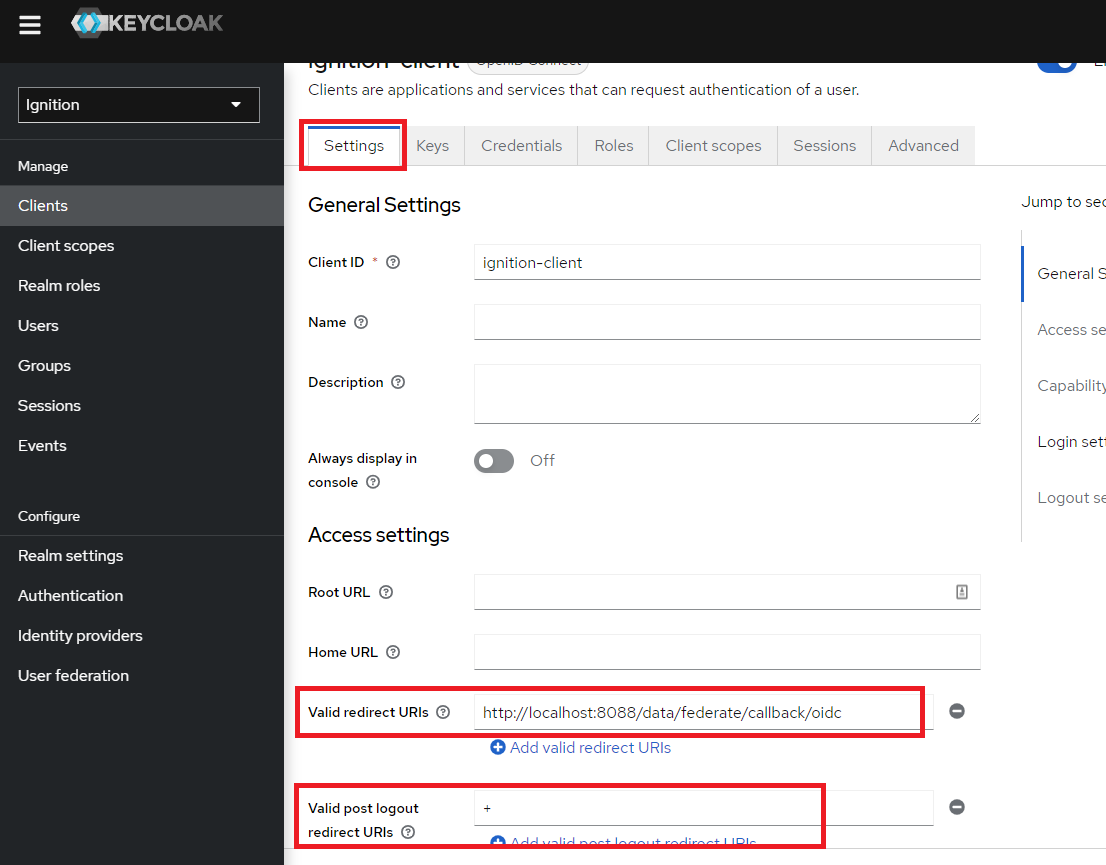
8. In Keycloak, navigate to the Clients > ignition-client > Settings tab. Paste the redirect URI from Ignition into the Valid redirect URIs box. Also, add a ‘+’ symbol into the Valid post logout redirect URIs box. This notifies Keycloak to use the same list of valid redirect URIs. Click Save to complete changes.
Testing Keycloak as Ignition Identity Provider
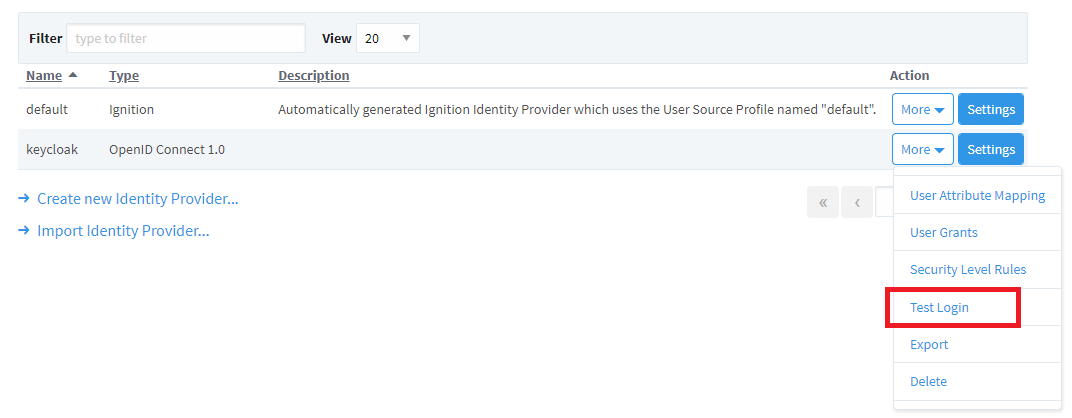
1. From within Ignition, navigate to Security > Identity Providers. Use the More dropdown menu for keycloak and select Test Login.
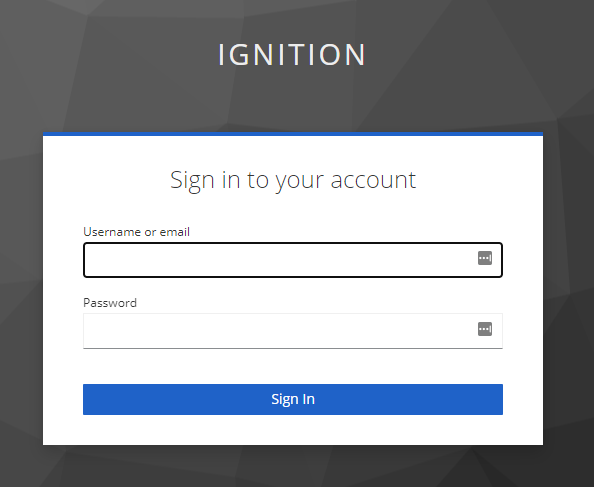
2. The default Keycloak login screen will appear. Note the ‘IGNITION’ name, which is referring to the Ignition realm created in Keycloak.
a. Sign in with one of the usernames created during setup.
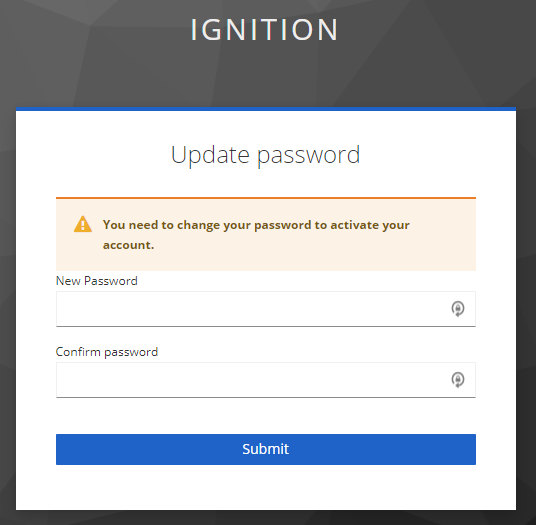
3. Since this is the initial sign in, a prompt will appear to update the password for this account. Again, for this example, the initial password credential was set to temporary, which forces an update to the password. Update the password and click Submit.
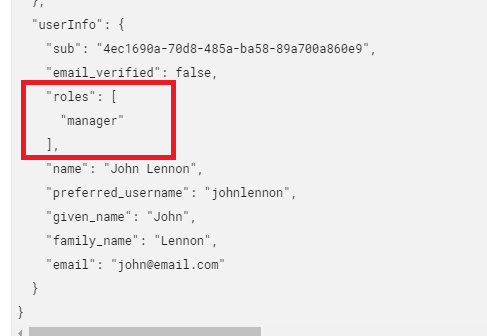
4. Upon a successful login, the response from Keycloak can be seen within Ignition.

5. Specifically, note the ‘roles’ token nested in the ‘userInfo’ token. This was previously configured in Keycloak.
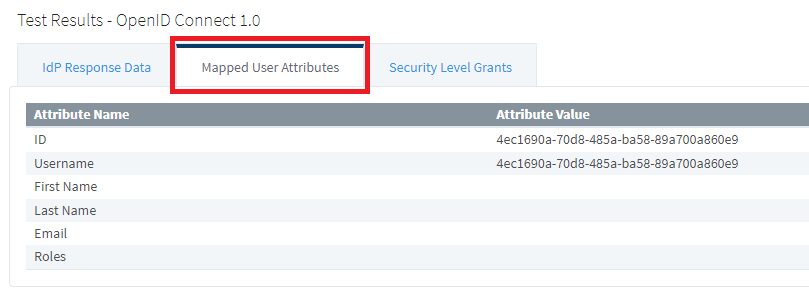
6. Navigate to the Mapped User Attributes tab. Notice that only the ID is properly mapped.
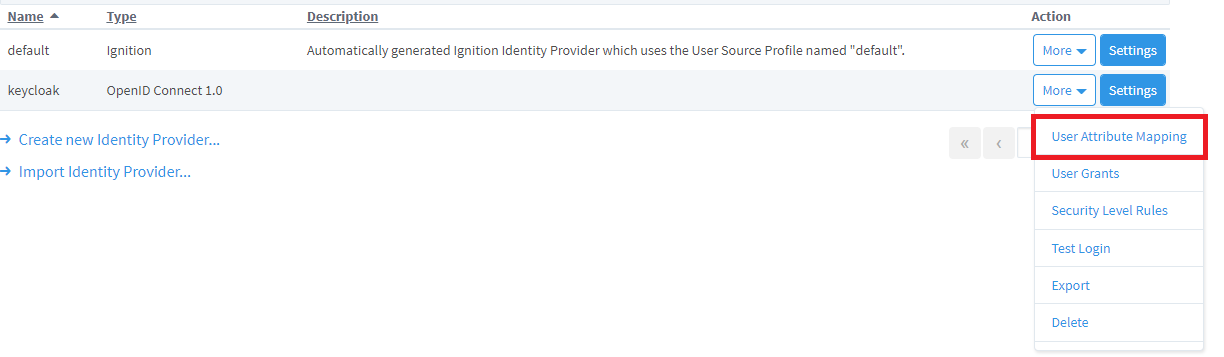
7. To set up the mapping, navigate to Security > Identity Providers. Use the More dropdown menu for keycloak and select User Attribute Mapping.
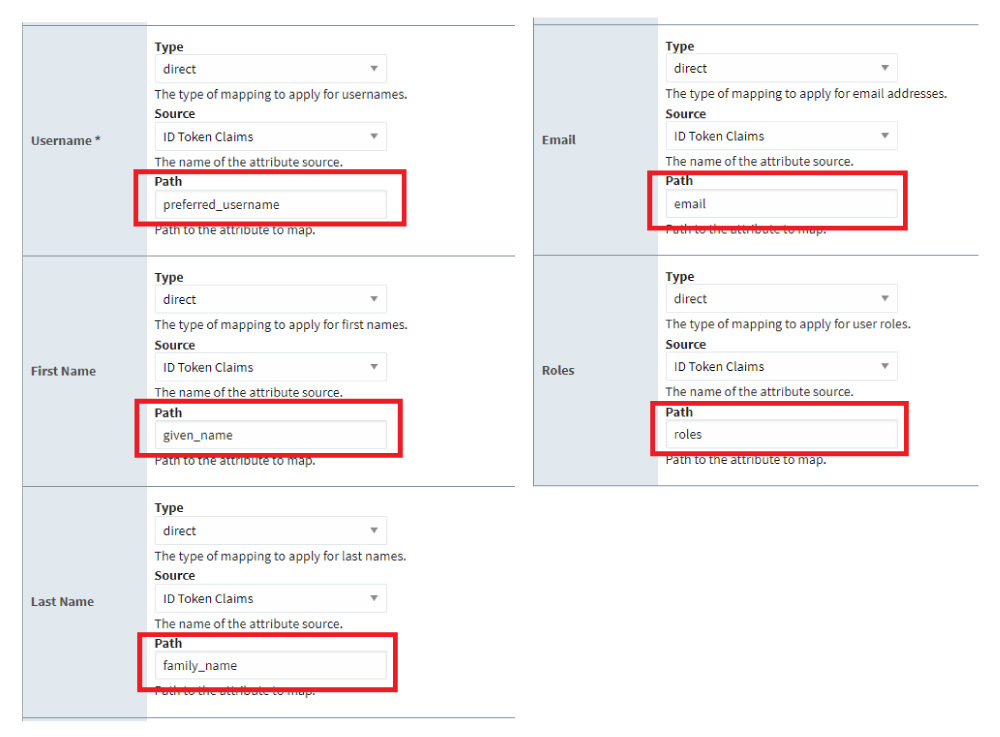
8. Map as follows:
a. Username: Type=direct, Source=ID Token Claims, Path=preferred_username
b. First Name: Type=direct, Source=ID Token Claims, Path=given_name
c. Last Name: Type=direct, Source=ID Token Claims, Path=family_name
d. Email: Type=direct, Source=ID Token Claims, Path=email
e. Roles: Type=direct, Source=ID Token Claims, Path=roles
9. Click Save.
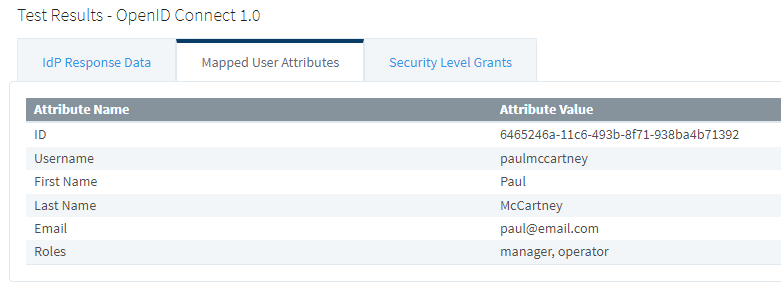
10. Test the Login again and navigate to the Mapped User Attributes. Notice the user info attributes are now properly mapped.
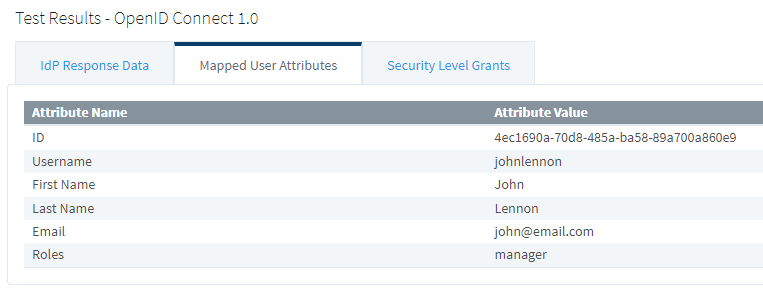
11. If a user has multiple roles, those will appear as a comma-separated list.
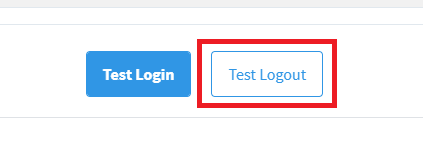
12. Verify the Test Logout redirects correctly as well.
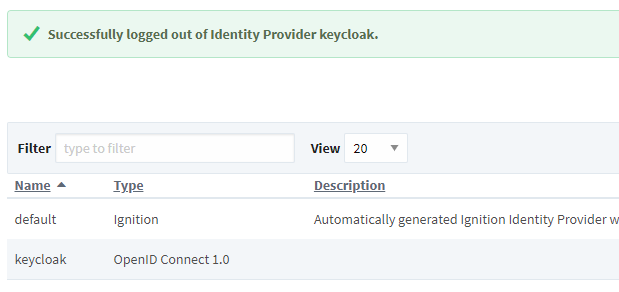
13. Ignition will confirm a successful logout.
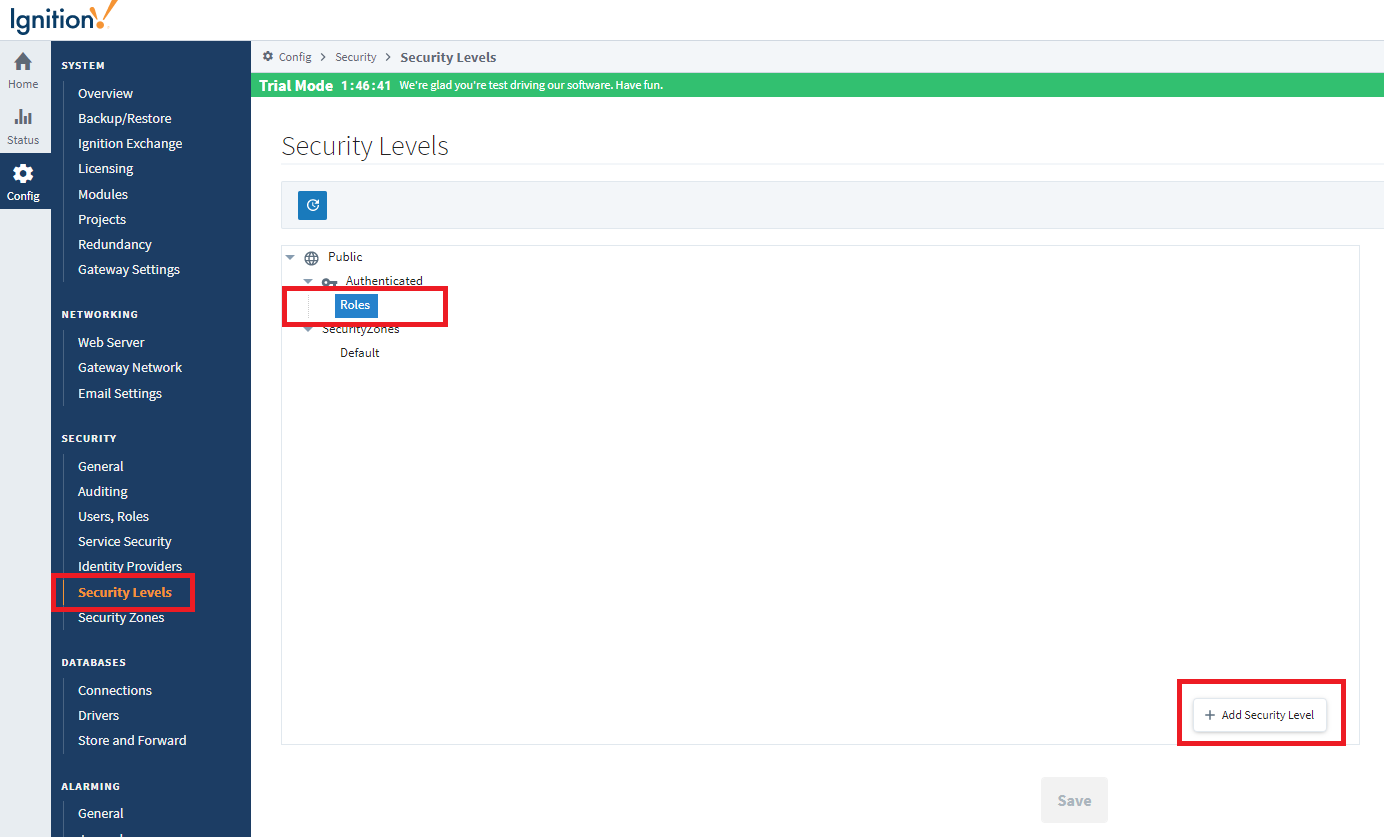
14. Finally, the security levels need to be defined in Ignition. The Security Level Grants in the test login results shows both of the configured keycloak roles.
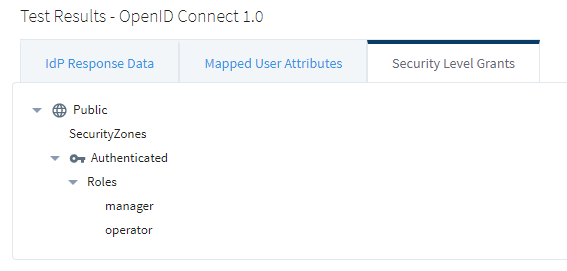
These roles need to be added to Ignition’s security levels. Navigate to Security > Security Levels and add the roles under the Roles branch.
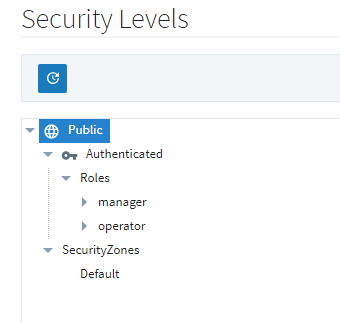
15. Once complete, click Save. The new roles should be visible in Ignition’s Security Levels tree.
Configuring Two-Factor Authentication (2FA)
Keycloak supports the use of a one-time password (OTP) via the Google Authenticator or FreeOTP apps. This feature is fully supported standalone (i.e., on-prem or offline).
1. Enforcing the OTP can be configured for all users or on a per user basis.
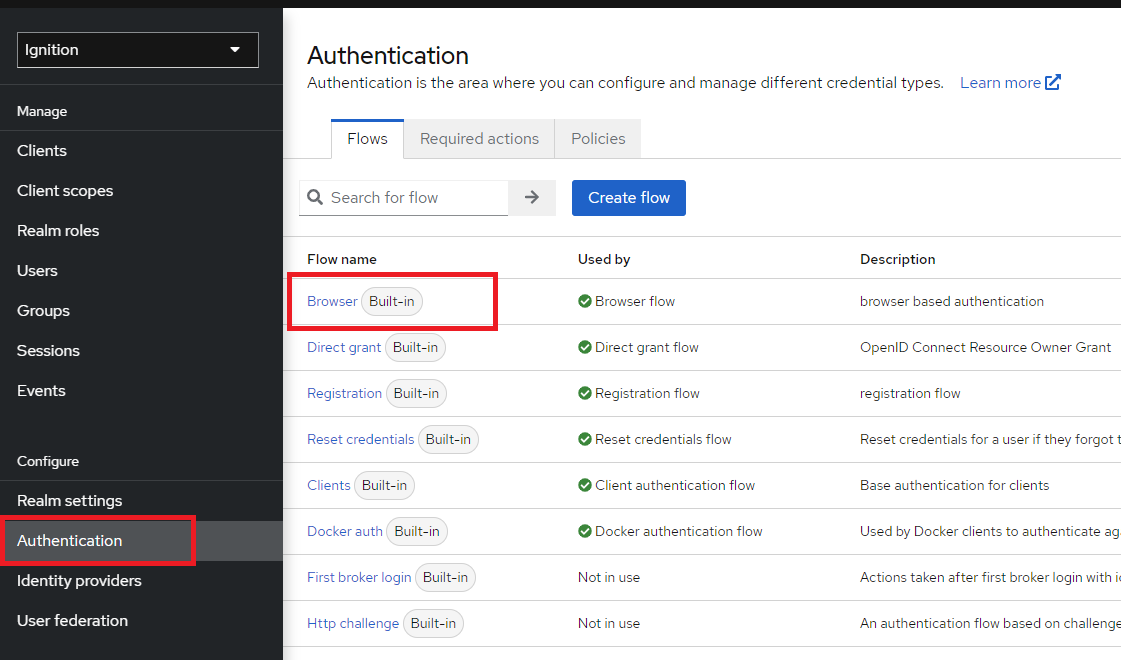
To configure an OTP for all users, navigate to the Authentication > Flows > Browser Flow name.
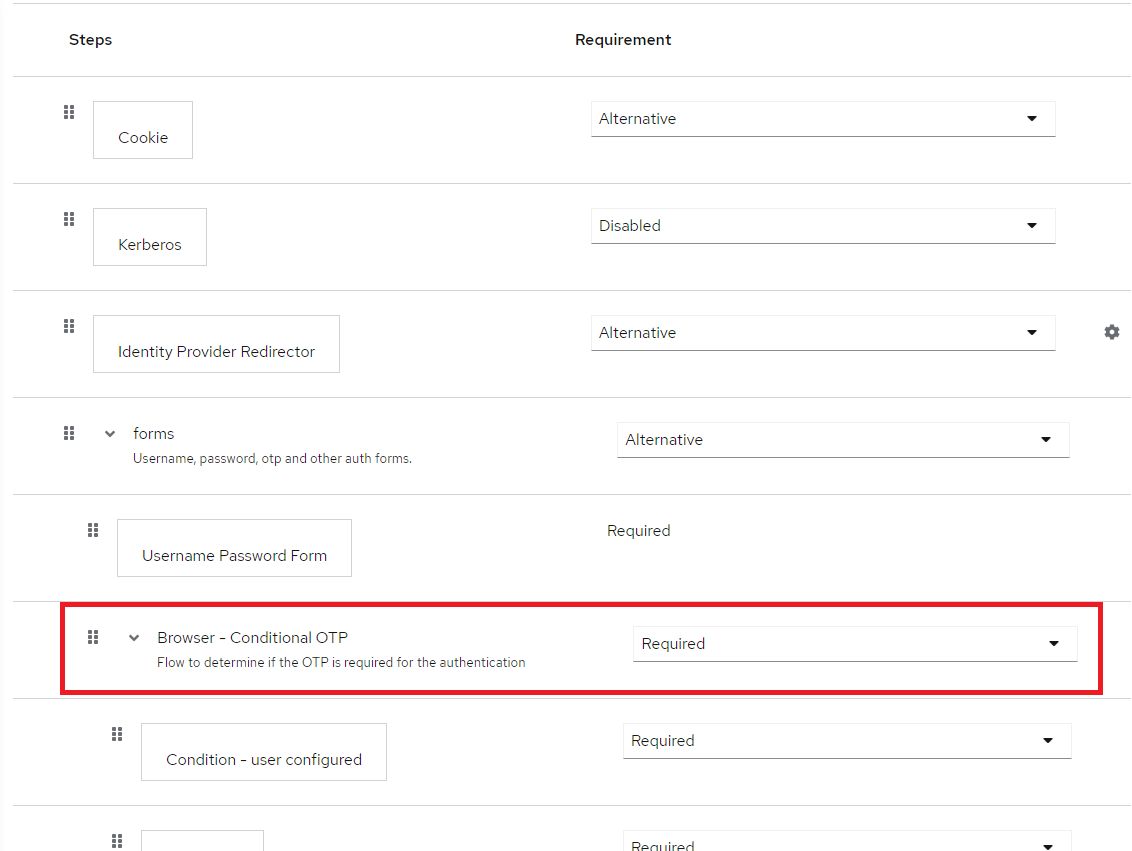
2. Find the Browser - Conditional OTP step and change it to Required.
NOTE: This will force all users to utilize an OTP with every login.
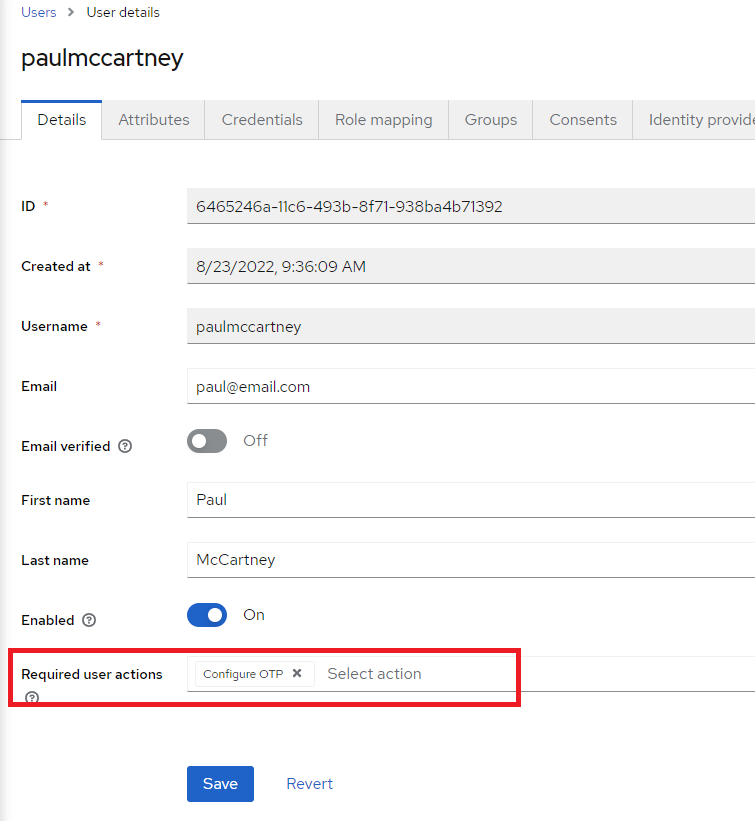
3. Another option is to set OTP on a per-user basis in the Required user actions when configuring a user. If this is configured, this particular user will be required to utilize the OTP with each login.
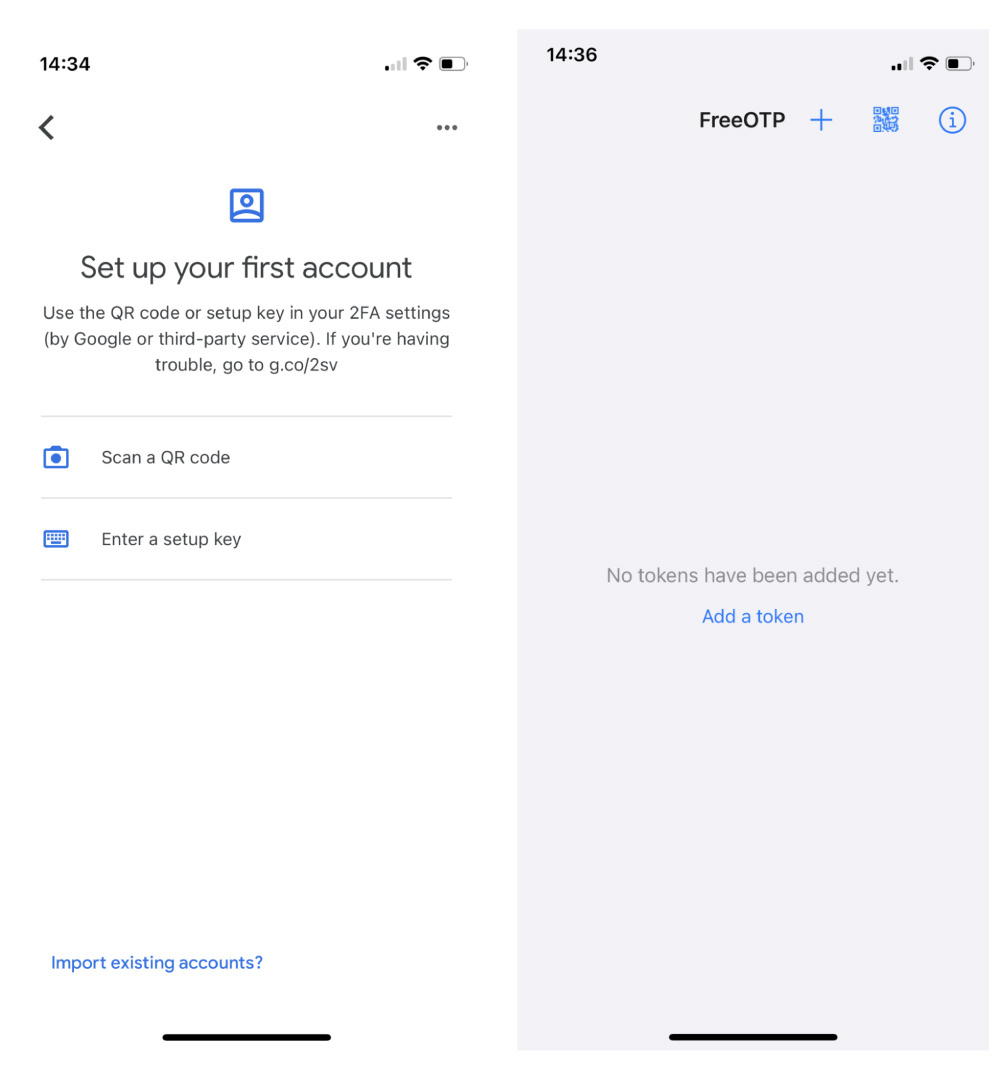
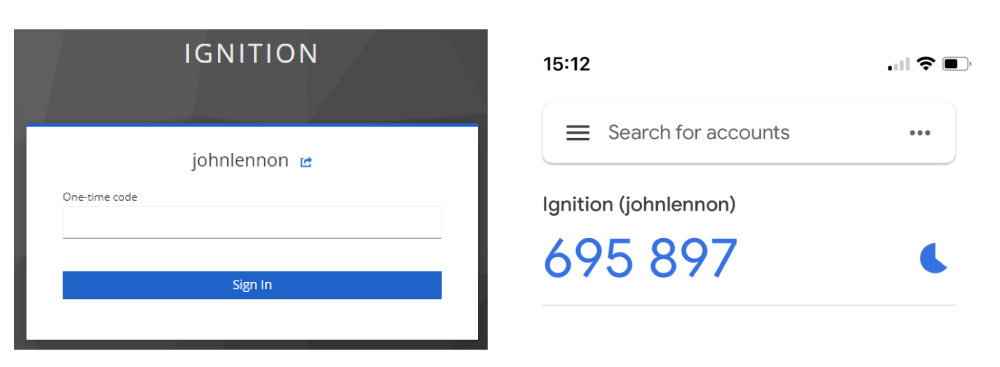
4. In either case, when the user logs in for the first time, the user will be prompted to set up the Mobile Authenticator (either FreeOTP or Google Authenticator).
NOTE: The FreeOTP or Google Authenticator app must be downloaded on a mobile device to proceed.
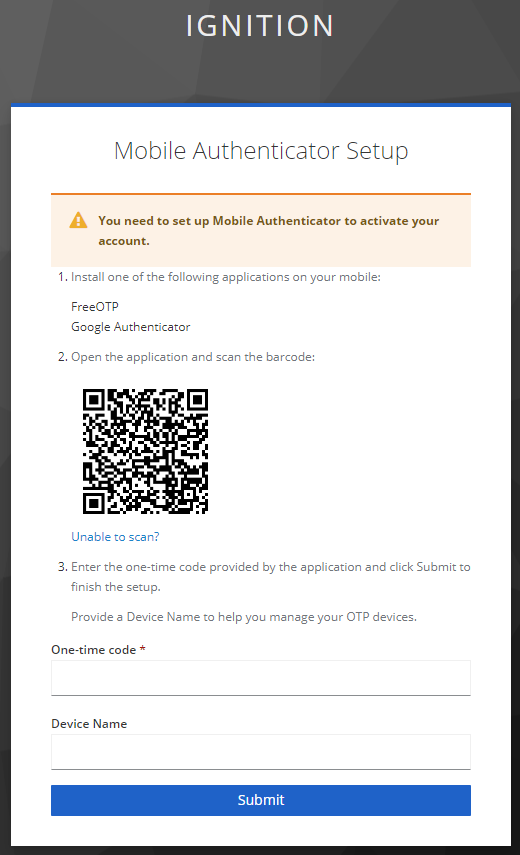
5. The apps have similar interfaces. In both apps, the QR code can be easily scanned.
6. If the scan doesn’t work, the setup key can be manually entered directly on the app. Select the “Unable to scan?” link on the login page. This will bring up another screen with the setup key.
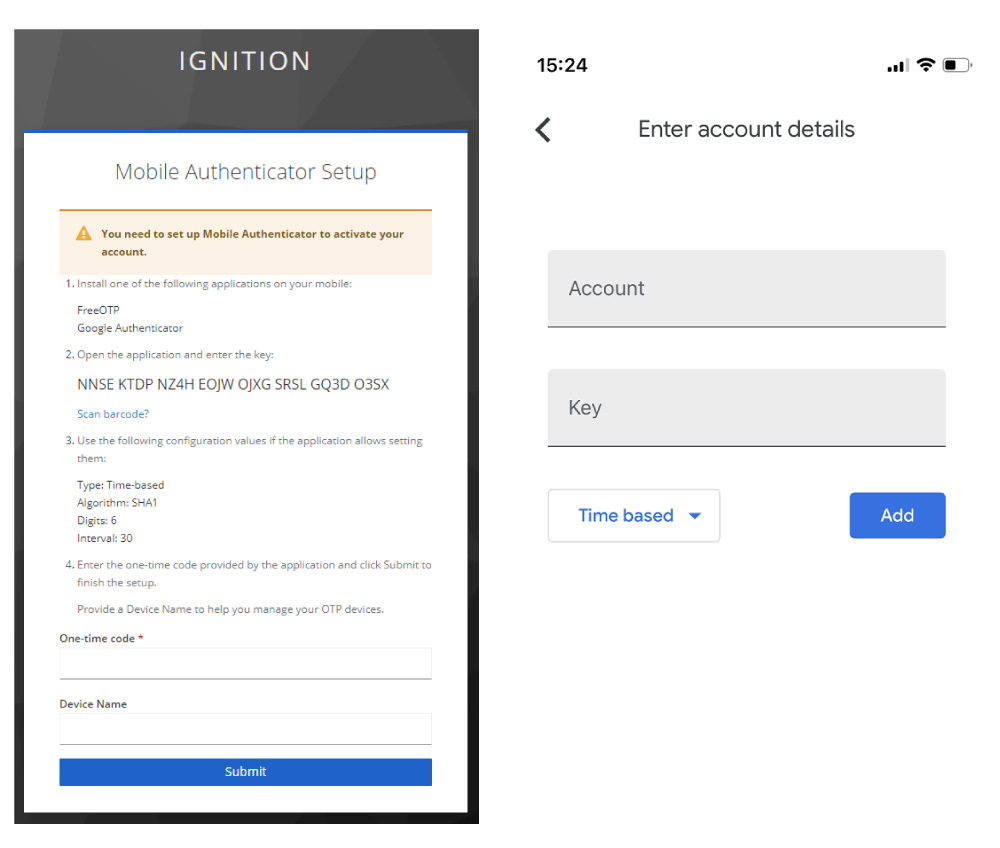
7. After the initial setup, the user will be prompted on each subsequent login for an OTP.
User Federation - Active Directory
In a scenario where a customer is using an existing external database or directory (like Active Directory) for user management, but also wants to add in 2FA (two-factor authentication), implementing the User Federation component of Keycloak is a great option. Using the following steps, Keycloak can be configured to import users into the local database and incorporate additional authentication requirements, such as OTP.
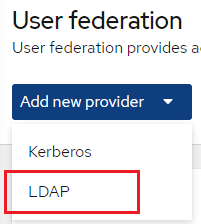
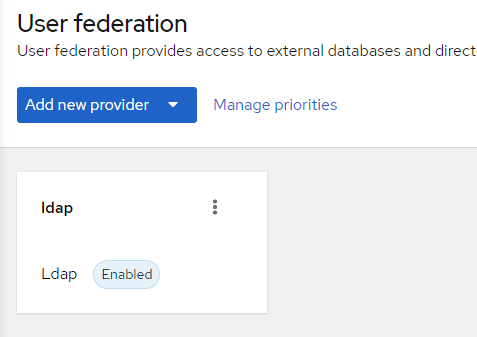
1. Select User federation from the side menu.
2. Select the dropdown Add new provider > LDAP.
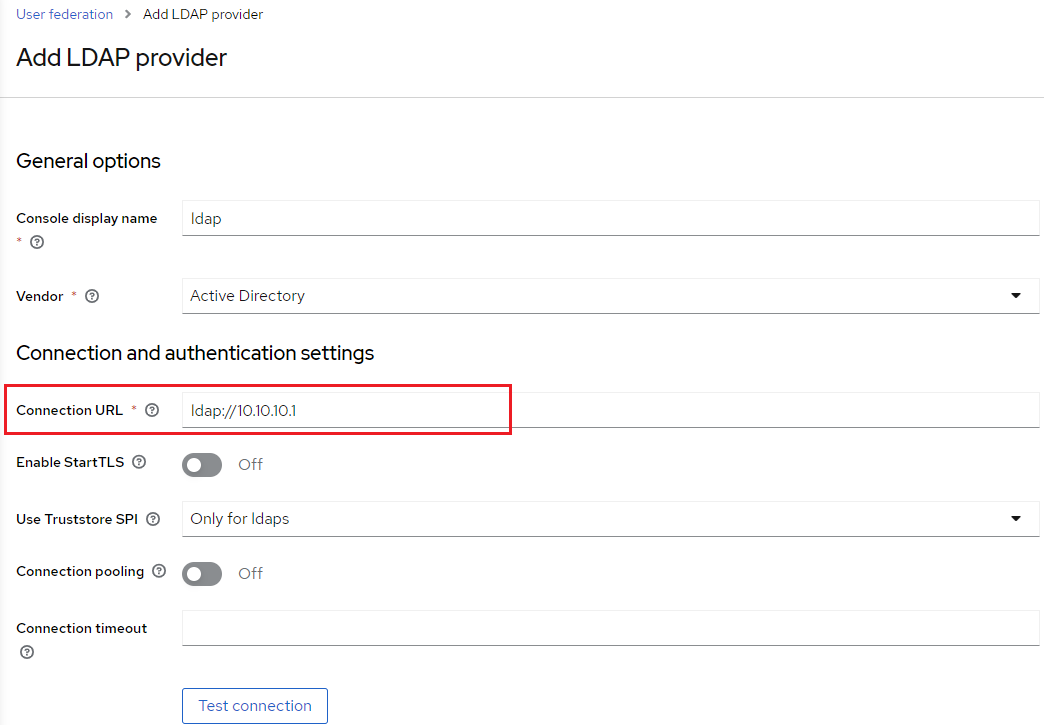
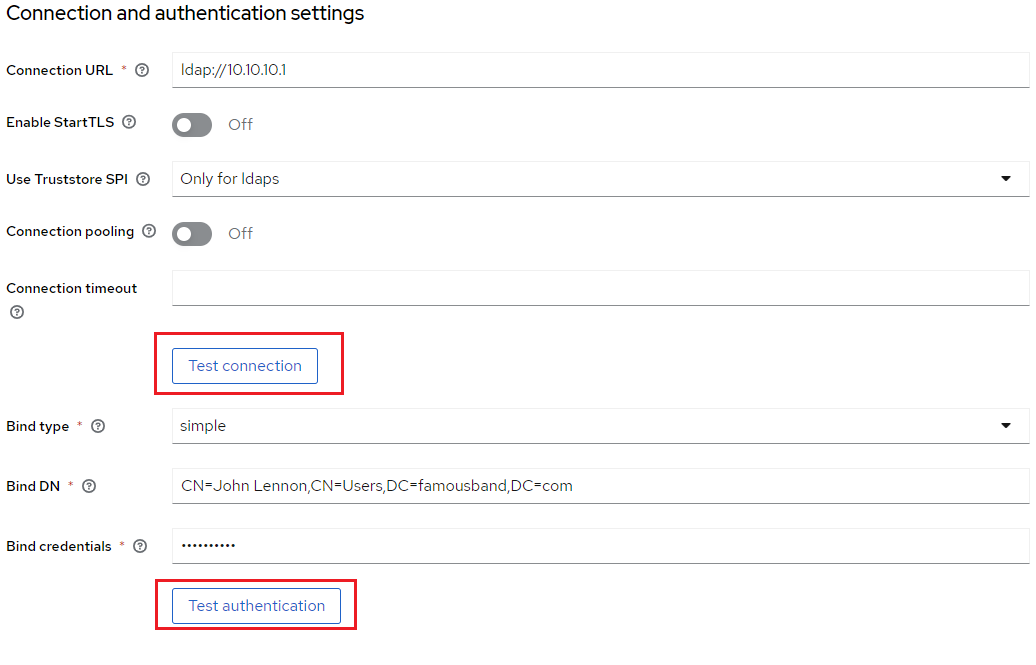
3. Add the Connection URL of the Active Directory server.
a. For example: ldap://<myADserverIP>
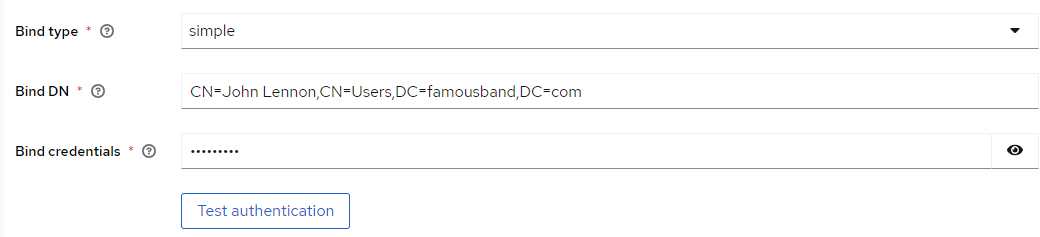
4. Next, add in the bind distinguished name (Bind DN) information.
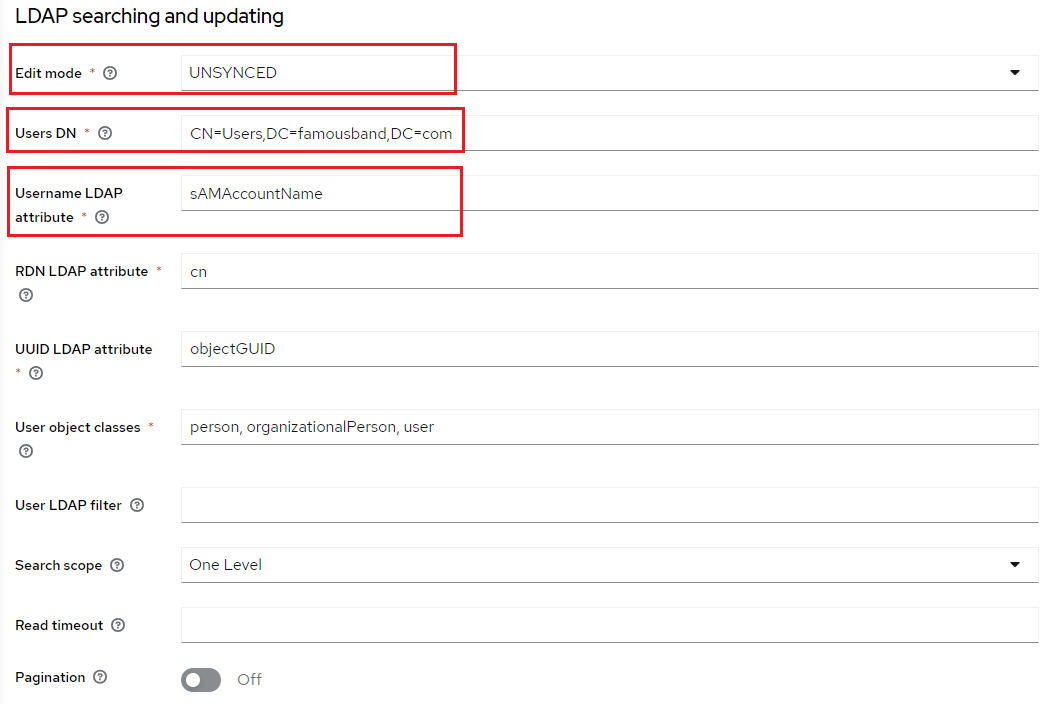
5. In the LDAP searching and updating section, select the desired Edit mode. There are three modes available for user storage: READ_ONLY, WRITEABLE, and UNSYNCED.
- READ_ONLY - All mapped attributes are unchangeable from Keycloak.
- WRITEABLE - All mapped attributes (including passwords) can be updated and synchronized with the LDAP store (AD) from Keycloak, depending on the LDAP update privileges defined in AD.
- UNSYNCED - All changes to mapped attributes are stored in the local Keycloak database. Synchronization of those attributes must happen separately through a different process.
NOTE: Only the WRITEABLE and UNSYNCED modes allow for use of OTP, which attaches to the user locally stored in the Keycloak database.
a. For this example, UNSYNCED will be selected for the mode.
b. Enter in the full DN of the LDAP tree for the Users.
c. Since Active Directory is being used, the Username LDAP attribute will be sAMAccountName.
6. Click Save to add the new LDAP provider.
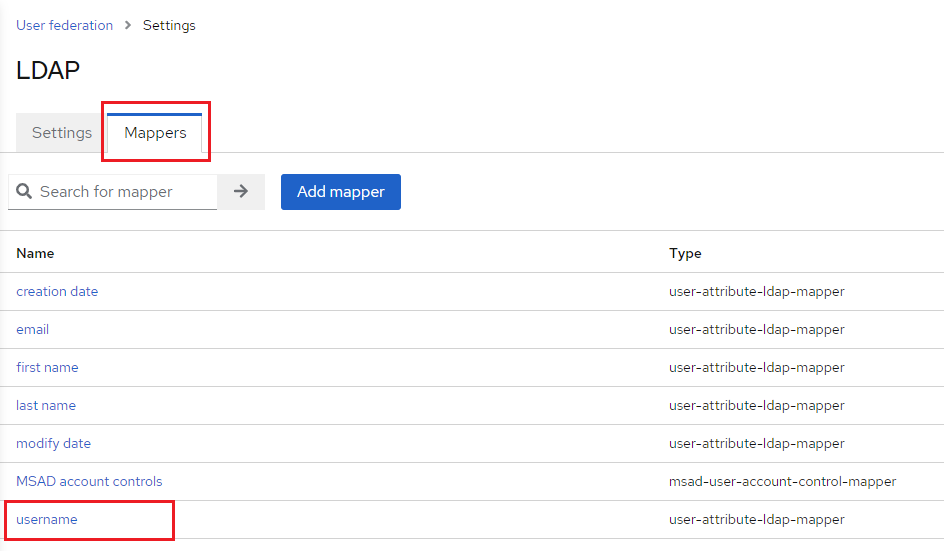
7. Select the newly added provider again.
8. Select the Mappers tab. Then, select the username mapper.
9. Modify the User Model Attribute to match the Username LDAP attribute previously entered during configuration. In this example, that value is sAMAccountName.
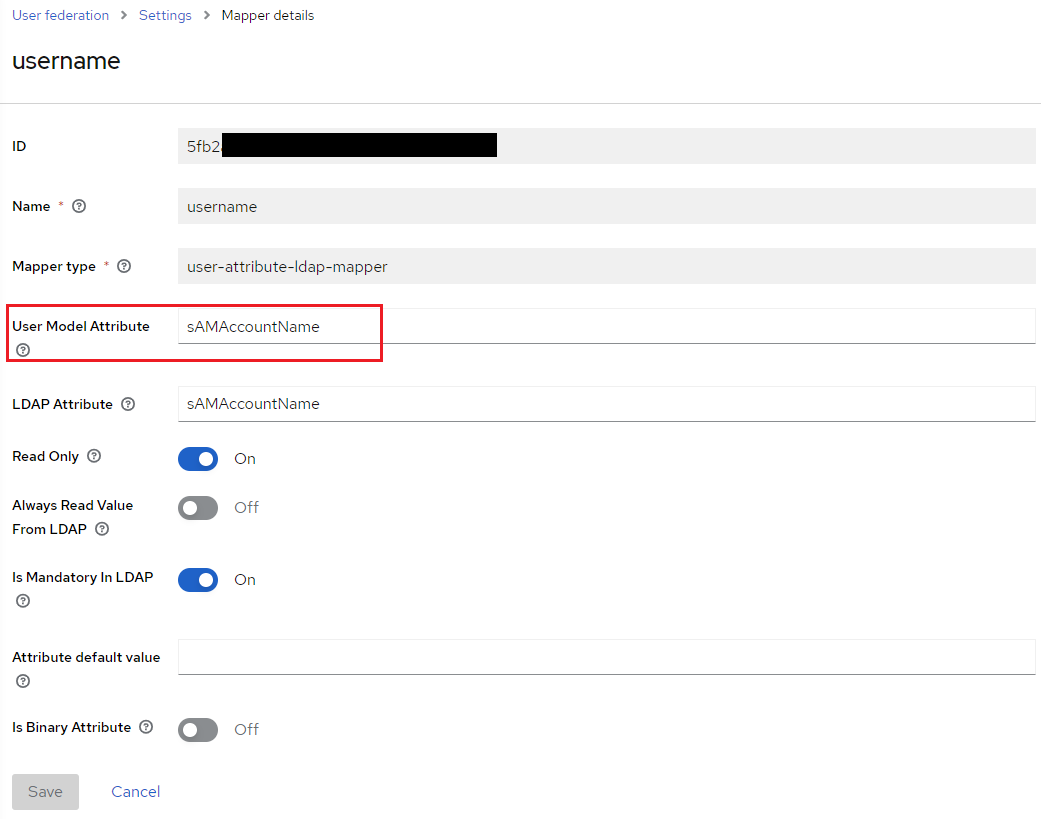
10. Click Save to apply the new mapper values.
11. Navigate back to the User federation settings. Verify that both the connection and authentication are successful by clicking Test connection and Test authentication.
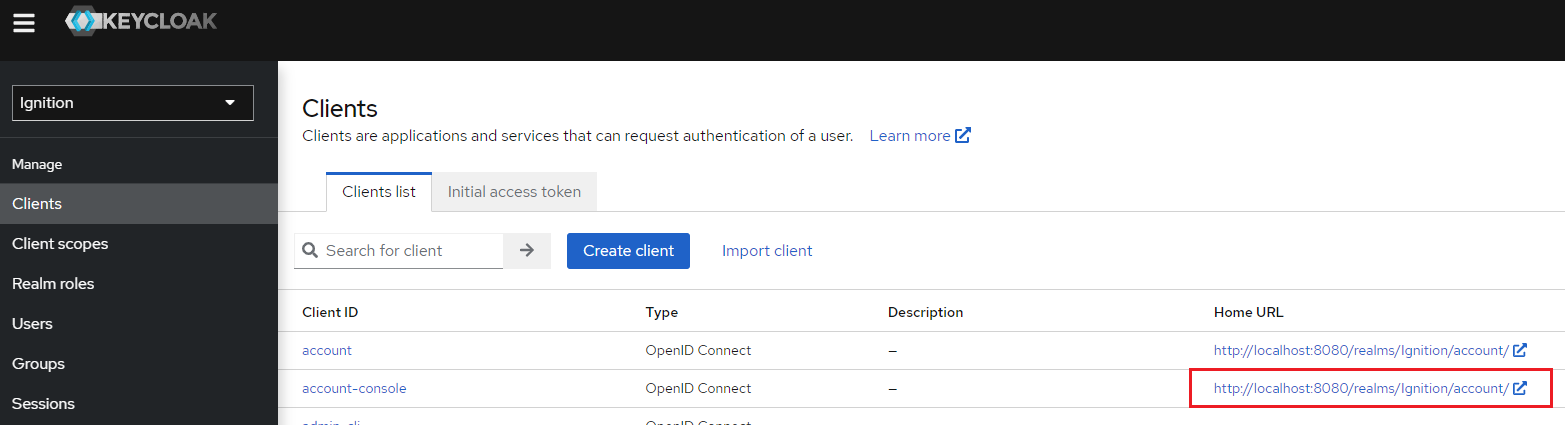
12. Once a successful connection has been established with Active Directory, verify that the user can be authenticated from Keycloak. Navigate to the Clients > Clients list > account-console Home URL.
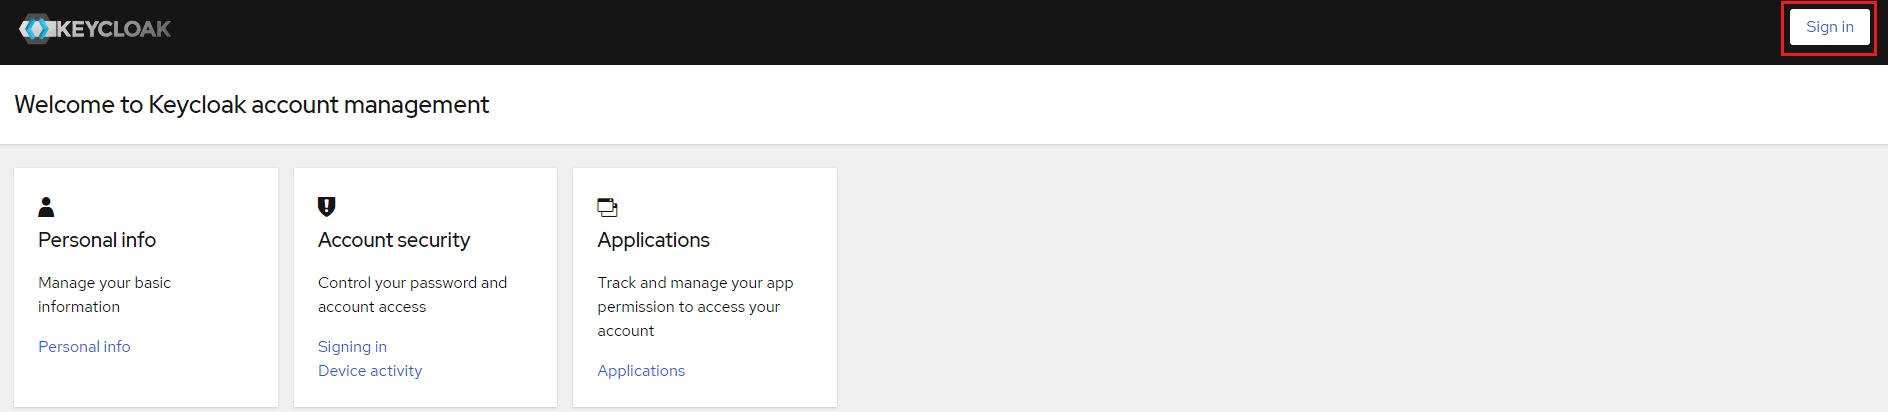
13. From this screen, click Sign in and enter a valid user within Active Directory to test.

14. To implement 2FA (two-factor authentication), please review the previous section for additional setup and configuration, Configuring Two-Factor Authentication.
Appendix - Resources
Installation:
https://www.keycloak.org/guides#getting-started
Docker:
https://docs.docker.com/get-started/#download-and-install-docker
https://www.keycloak.org/getting-started/getting-started-docker
Two-Factor Authentication:
https://www.keycloak.org/docs/latest/server_admin/#one-time-password-otp-policies
LDAP:
https://www.keycloak.org/docs/latest/server_admin/#_ldap
https://medium.com/@yasithkumara/active-directory-as-a-user-federation-in-keycloak-926fd7cc3256
Last Updated on: December 11, 2023

About The Company
Inductive Automation
Inductive Automation is a leader in industrial automation
software that empowers its customers to “Dream It, Do It.”
It was founded in 2003 by Steve Hechtman, a prominent system
integrator with a quarter-century of experience, who was
determined to solve SCADA pain points. As a result, the
company created its flagship product Ignition, the #1
platform for SCADA, HMI, IIoT, MES, and more.
In business and privately owned for over 20 years,
Inductive Automation’s global presence is flourishing:
140+ countries have Ignition installations, there are
4,000+ integrators in its integrator program, and 65% of
the Fortune 100 use Ignition. The company has earned
numerous industry accolades, and was recently recognized
in Automation World’s 2025 Leaders in Automation program
in five categories.
Want to stay up-to-date with us?
Sign up for our weekly News Feed.
By clicking "Sign me up," you agree to Inductive Automation's Terms of Use and acknowledge that you have read Inductive Automation's Privacy Policy.